Complete guide to deploy Test2Go on your server.
This guide will help you install Test2Go on your server. We provide two installation methods:
Recommendation: Use cPanel if you’re not familiar with command line.
OpenSSL, PDO, Mbstring, Tokenizer, XML, Ctype, JSON, BCMath, Fileinfo, GDThese are usually pre-installed on modern cPanel hosting.
Before starting, prepare:
public_html folder (or your domain
folder)test2go.zip filepublic_html (or
your domain folder)
⚠️ IMPORTANT: Document Root Configuration
Test2Go requires the document root to point to the
public/ folder. There are two approaches:
Option A: Standard Deployment (Recommended for cPanel)
public_html/public_html/ (default)https://your-domain.com will automatically
redirect to public/.htaccess file handles this redirection
automaticallyOption B: Secure Deployment (Recommended for VPS)
public_html/public_html/public/For cPanel users: Option A works perfectly. The
included .htaccess files provide security.
Note about .htaccess files:
To verify .htaccess files exist:
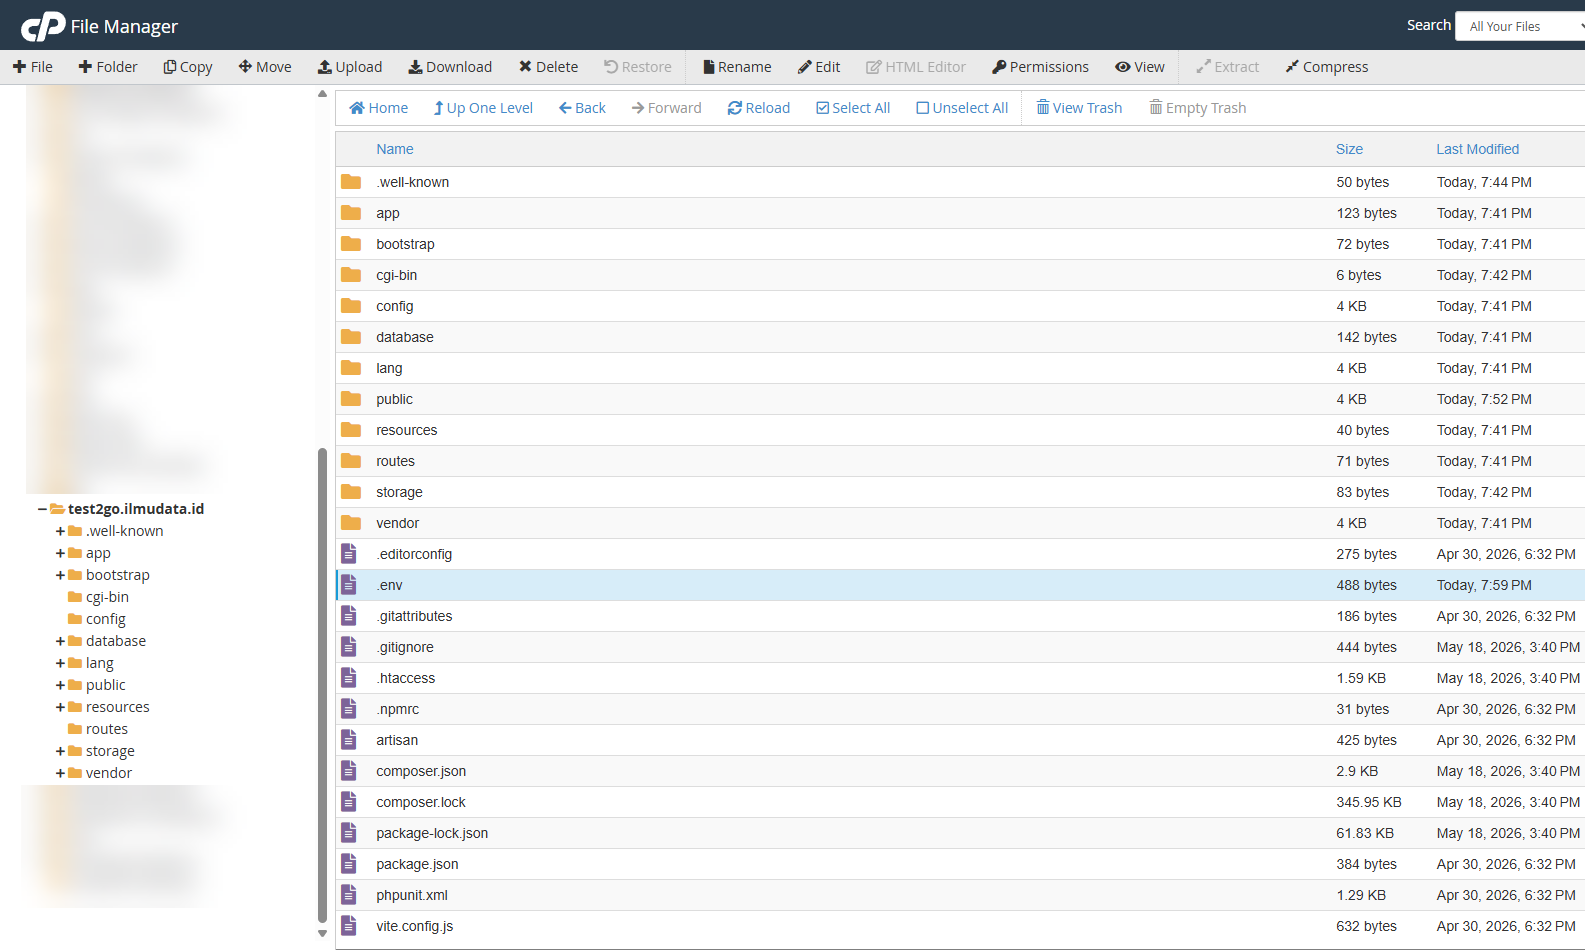
.htaccess in: root,
public/, storage/, bootstrap/,
database/test2go (or any name)Note this information:
Database Name: username_test2go
Username: username_test2gouser
Password: (password you generated)
Host: ip address (usually localhost, but check with your hosting provider)storage folder775Repeat for bootstrap/cache folder
.env.example file.env.env file → EditAPP_NAME=Test2Go
APP_URL=https://your-domain.com
DB_CONNECTION=mysql
DB_HOST=localhost
DB_DATABASE=username_test2go
DB_USERNAME=username_test2gouser
DB_PASSWORD=your_saved_passwordOption A: Using cPanel Terminal
cd public_html
php artisan key:generate
php artisan migrate --force
php artisan db:seed
Option B: Web Installer (if available)
https://your-domain.com/install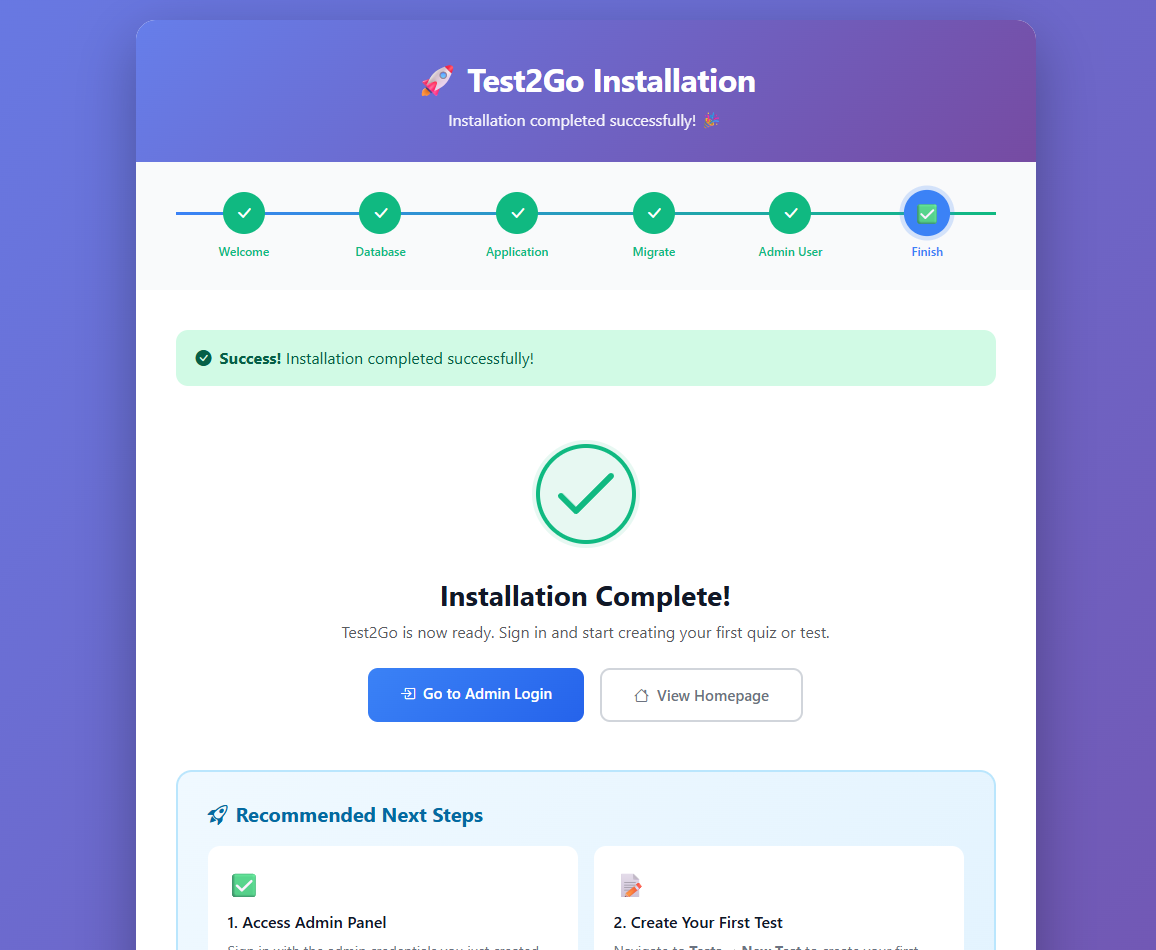
https://your-domain.com in browser⚠ IMPORTANT: Change password immediately after first login!
✓ Congratulations! Test2Go is now installed.
For users with VPS/Dedicated Server.
Ubuntu/Debian:
sudo apt update
sudo apt install software-properties-common
sudo add-apt-repository ppa:ondrej/php -y
sudo apt update
sudo apt install -y php8.4 php8.4-cli php8.4-fpm php8.4-mysql \
php8.4-xml php8.4-mbstring php8.4-curl php8.4-zip php8.4-gd \
php8.4-bcmath php8.4-intl

php -vsudo apt install -y mysql-server
sudo mysql_secure_installationFollow the wizard: - Set root password - Remove anonymous users: Y - Disallow root login remotely: Y - Remove test database: Y - Reload privilege tables: Y
curl -sS https://getcomposer.org/installer | php
sudo mv composer.phar /usr/local/bin/composer
composer --versionsudo mysql -u root -pIn MySQL prompt, enter:
CREATE DATABASE test2go CHARACTER SET utf8mb4 COLLATE utf8mb4_unicode_ci;
CREATE USER 'test2go_user'@'localhost' IDENTIFIED BY 'your_strong_password';
GRANT ALL PRIVILEGES ON test2go.* TO 'test2go_user'@'localhost';
FLUSH PRIVILEGES;
EXIT;
Change
your_strong_passwordto a secure password and save it for later.
Now, upload test2go.zip to your server (using SFTP or
SCP), then run:
cd /var/www
sudo wget https://your-download-link/test2go.zip
sudo unzip test2go.zip
sudo mv test2go html

# Set ownership
sudo chown -R www-data:www-data /var/www/html
sudo chmod -R 755 /var/www/html
sudo chmod -R 775 /var/www/html/storage
sudo chmod -R 775 /var/www/html/bootstrap/cachecd /var/www/html
sudo -u www-data composer install --no-dev --optimize-autoloader
npm install
npm run buildsudo cp .env.example .env
sudo nano .envEdit:
APP_NAME=Test2Go
APP_ENV=production
APP_DEBUG=false
APP_URL=https://your-domain.com

DB_CONNECTION=mysql
DB_HOST=127.0.0.1
DB_PORT=3306
DB_DATABASE=test2go
DB_USERNAME=test2go_user
DB_PASSWORD=your_strong_password
Save (Ctrl+X, Y, Enter)
sudo -u www-data php artisan key:generatesudo -u www-data php artisan migrate --force
sudo -u www-data php artisan db:seedFor Apache:
Create file
/etc/apache2/sites-available/test2go.conf:
<VirtualHost *:80>
    ServerName your-domain.com
    DocumentRoot /var/www/html/public

    <Directory /var/www/html/public>
        AllowOverride All
        Require all granted
    </Directory>

    ErrorLog ${APACHE_LOG_DIR}/test2go_error.log
    CustomLog ${APACHE_LOG_DIR}/test2go_access.log combined
</VirtualHost>
Enable:
sudo a2ensite test2go.conf
sudo a2enmod rewrite
sudo systemctl restart apache2
For Nginx:
Create file /etc/nginx/sites-available/test2go:
server {
    listen 80;
    server_name your-domain.com;
    root /var/www/html/public;
    index index.php index.html;

    # Add security headers (equivalent to Apache .htaccess)
    add_header X-Content-Type-Options "nosniff" always;
    add_header X-Frame-Options "SAMEORIGIN" always;
    add_header X-XSS-Protection "1; mode=block" always;
    add_header Referrer-Policy "strict-origin-when-cross-origin" always;

    # Disable directory indexing
    autoindex off;

    # Block access to sensitive files
    location ~ /\.(env|git) {
        deny all;
        return 404;
    }

    location ~ (composer\.(json|lock)|package(-lock)?\.json|phpunit\.xml)$ {
        deny all;
        return 404;
    }

    # Block access to sensitive directories (if accessed outside public/)
    location ~ ^/(app|bootstrap|config|database|lang|resources|routes|storage|tests|vendor) {
        deny all;
        return 404;
    }

    # Allow .well-known for SSL certificate verification
    location ~ /\.well-known {
        allow all;
    }

    # Main location
    location / {
        try_files $uri $uri/ /index.php?$query_string;
    }

    # PHP handler
    location ~ \.php$ {
        try_files $uri =404;
        fastcgi_split_path_info ^(.+\.php)(/.+)$;
        fastcgi_pass unix:/var/run/php/php8.4-fpm.sock;
        fastcgi_index index.php;
        fastcgi_param SCRIPT_FILENAME $realpath_root$fastcgi_script_name;
        include fastcgi_params;

        # Pass Authorization header (for API authentication)
        fastcgi_param HTTP_AUTHORIZATION $http_authorization;
    }

    # Deny access to other .php files in public directory (security)
    location ~ ^/(?!index\.php).+\.php$ {
        deny all;
        return 404;
    }

    # Cache static assets
    location ~* \.(jpg|jpeg|png|gif|ico|css|js|svg|woff|woff2|ttf|eot)$ {
        expires 30d;
        add_header Cache-Control "public, immutable";
    }

    error_log /var/log/nginx/test2go_error.log;
    access_log /var/log/nginx/test2go_access.log;
}
Enable:
sudo ln -s /etc/nginx/sites-available/test2go /etc/nginx/sites-enabled/
sudo nginx -t
sudo systemctl restart nginxYou can use Certbot to get a free SSL certificate from Let’s Encrypt.
sudo apt install -y certbot python3-certbot-apache
# Or for nginx: python3-certbot-nginx

sudo certbot --apache -d your-domain.com
# Or for nginx: sudo certbot --nginx -d your-domain.com
Follow the wizard, choose to redirect HTTP to HTTPS.
Open https://your-domain.com and login with: - Email:
admin@test2go.local - Password: password
Change password immediately!
Test2Go includes 5 .htaccess files for security and proper routing:
| File Location | Purpose | Critical? |
|---|---|---|
/.htaccess (root) |
Redirect to public/ if document root is wrong |
⚠️ Important |
/public/.htaccess |
Main routing & security headers | 🔴 CRITICAL |
/storage/.htaccess |
Block web access to logs & cache | 🔴 CRITICAL |
/bootstrap/.htaccess |
Block web access to bootstrap files | ⚠️ Important |
/database/.htaccess |
Block web access to migrations | ⚠️ Important |
These files are automatically included in the package and work out-of-the-box.
If URL is incorrect, edit .env file:
APP_URL=https://your-correct-domain.comThen run:
php artisan config:cacheCause: Wrong password or inactive account
Solution: 1. Check default password:
password 2. Reset password via database:
php artisan tinker
>>> $admin = User::where('email', 'admin@test2go.local')->first();
>>> $admin->password = Hash::make('new_password');
>>> $admin->is_active = true;
>>> $admin->save();
>>> exitCause: Wrong permissions or PHP error
Solution: 1. Check permissions:
sudo chmod -R 775 storage bootstrap/cache
sudo chown -R www-data:www-data storage bootstrap/cachetail -f storage/logs/laravel.logCause: Incorrect database info in
.env
Solution: 1. Check .env, ensure
DB_HOST, DB_DATABASE, DB_USERNAME, DB_PASSWORD are correct 2. Test
connection:
mysql -u test2go_user -p test2goCause: Test not published yet
Solution: 1. Login as admin 2. Edit test 3. Change status to Published 4. Save
Cause: .htaccess not working or rewrite module not active
Apache Solution:
sudo a2enmod rewrite
sudo systemctl restart apache2
Check that AllowOverride All is set in Apache
config:
<Directory /var/www/html/public>
    AllowOverride All
    Require all granted
</Directory>
Nginx Solution: Ensure config is correct (see
installation steps above). Nginx doesn’t use .htaccess
files.
cPanel Solution: 1. Verify .htaccess
file exists in public_html/public/ directory 2. If missing,
re-extract the package 3. Check file permissions (should be 644)
Cause: File hidden or deleted during upload
Solution:
cPanel: 1. Open File Manager 2.
Click Settings (top right) 3. Check Show Hidden
Files (dotfiles) 4. Click Save 5. Verify
.htaccess files exist in: - public/ - Root
directory - storage/ - bootstrap/ -
database/
If missing, extract from ZIP again.
VPS:
# List all .htaccess files
find /var/www/html -name ".htaccess"

# Should show:
# /var/www/html/.htaccess
# /var/www/html/public/.htaccess
# /var/www/html/storage/.htaccess
# /var/www/html/bootstrap/.htaccess
# /var/www/html/database/.htaccessCause: .well-known directory blocked by
.htaccess
Solution: Test2Go’s .htaccess files
already whitelist .well-known for SSL verification. If
still failing:
# Test .well-known accessibility
curl -I http://your-domain.com/.well-known/acme-challenge/test

# Should return 404 (not 403 Forbidden)
If you get 403, check root .htaccess file for proper
.well-known exception.
Symptoms: - Can access
your-domain.com/composer.json - Can access
your-domain.com/.env - Can browse /storage/
directory
Cause: .htaccess files not working or document root misconfigured
Solution:
Verify document root points to public/
folder (CRITICAL!)
❌ Wrong: /var/www/html or
public_html/
✅ Correct: /var/www/html/public or
public_html/public/
Test protection:
# These should all return 403/404:
curl -I https://your-domain.com/.env
curl -I https://your-domain.com/composer.json
curl -I https://your-domain.com/storage/
If accessible, check .htaccess:
cat public/.htaccess
# Verify it contains security rulesSolution:
# cPanel
chmod -R 775 storage bootstrap/cache

# VPS
sudo chown -R www-data:www-data /var/www/html
sudo chmod -R 775 storage bootstrap/cacheCause: JavaScript error or internet connection
Solution:
cPanel:
VPS:
mysqldump -u test2go_user -p test2go > backup_$(date +%Y%m%d).sqlcPanel: 1. Open File Manager 2.
Select public_html folder 3. Click
Compress 4. Download ZIP file
VPS:
tar -czf test2go_backup_$(date +%Y%m%d).tar.gz \
    /var/www/html/storage \
/var/www/html/.envcPanel: 1. Open phpMyAdmin 2. Select database 3. Click Import 4. Choose SQL backup file 5. Click Go
VPS:
mysql -u test2go_user -p test2go < backup_20260516.sqlAPP_DEBUG=false)storage/logs/laravel.logIf you encounter issues:
storage/logs/laravel.logEnjoy using Test2Go! 🎉
Last updated: May 2026